![]()
Overview
Recently I took the Offensive Security Penetration Testing with Backtrack (PWB) course, passed the exam, and achieved the OSCP certification. I learned a ton and earned my most rewarding cert yet. There are several great reviews of the course but I figured I’d provide my perspective.
Motivations
In my current job I’m lucky enough to touch on all aspects of information security from policy and process development to application security testing. The latter (which is where I spend the majority of my time) requires that I keep my technical skills sharp. I’m a big believer in training that takes a hands-on approach. I’ve attended SANS training before but I had recently heard many good things about Offensive Security. The pricing of the courses made it an easy sell and the 90+ days of available lab time (you can extend it if desired) meant it would not be another cram-session course. After reading several online reviews I decided this would be the next professional development course for me.
Course Registration
You can register for 30, 60, or 90 days of lab time — I chose 90. I registered in mid-June of this year and the timing was less than ideal as my wife was approaching her third trimester of pregnancy — meaning my anticipated exam time would be about two weeks before the baby was due. Definitely not the best for my stress levels but I knew that if I didn’t squeeze it in now, I might not have a chance to get it done for a while. Registration requires the use of a non-free email address (no gmail, yahoo, etc). Once you’ve applied for registration, you’ll receive an email with some basic instructions and a link to continue the registration process. If you proceed, you’ll receive a lab connectivity guide and software to test the VPN connectivity. They ask you do this before you submit any payment to ensure you will have no problems accessing the lab environment. Once you’ve successfully tested your connection you can submit your payment. On the first day of your scheduled course, you’ll receive an email with some more instructions as well as the course materials (pdf course guide and videos). You can visit the FAQ page which contains additional information about the registration process here: http://www.offensive-security.com/faq/
Course Prerequisites
The prerequisites for PWB as cited by Offsec are “a solid understanding of TCP/IP, networking and reasonable Linux skills”. With that knowledge you should have no problem getting through the course but I do have some additional recommendations for prospective students to ensure you get the most out of your course time:
You should be comfortable with scripting.
I use scripting regularly in my day-to-day work and it proved very valuable during the course. You’ll find yourself repeating enumeration steps over and over and automating tasks via scripting saves so much time. What language you choose is pretty much up to you but the majority of exploits you’ll run across will probably be written in either Python or Perl. The course does cover bash scripting but it can’t hurt to familiarize yourself with it ahead of time if it’s not one of your strong suits.
You should be comfortable with Linux and Windows command line syntax.
This wasn’t an issue for me, but if necessary, take some time to ensure you can navigate the CL in both OS’s. There’s a lot of material covered in the PWB course so you don’t want to be struggling with the basics at the same time.
You should be familiar with Assembly and a debugger
Since buffer overflows are just one of the many topics you’ll cover in the course this might be the least important of the recommendations but I think if you have some knowledge of Assembly and using a debugger you’ll be ahead of the game. If you want to take a free crash course on Assembly check out http://www.securitytube.net. I recommend the Assembly Language Megaprimer for Linux, the Windows Assembly Language Megaprimer, and the Buffer Overflow Exploitation Megaprimer for Linux. If you watch and comprehend these video series, you should have no problem tackling the basic buffer overflow exploits presented in the PWB course.
Get your “attacking” machine up and running.
The course recommends the last version of Backtrack but I used the newest version of Kali with no problems. The directory structure is organized a bit differently so you’ll have to adapt accordingly when following along with the video lessons but it’s no big deal. I personally prefer virtualization so I used a Macbook Pro running a Kali VM on VirtualBox. I would recommend updating the VM before you start the course and once you have everything working, don’t touch it again until after you’ve completed the exam. You don’t want a failed software update or misconfiguration to derail your progress.
Devise an organized note-taking and backup approach.
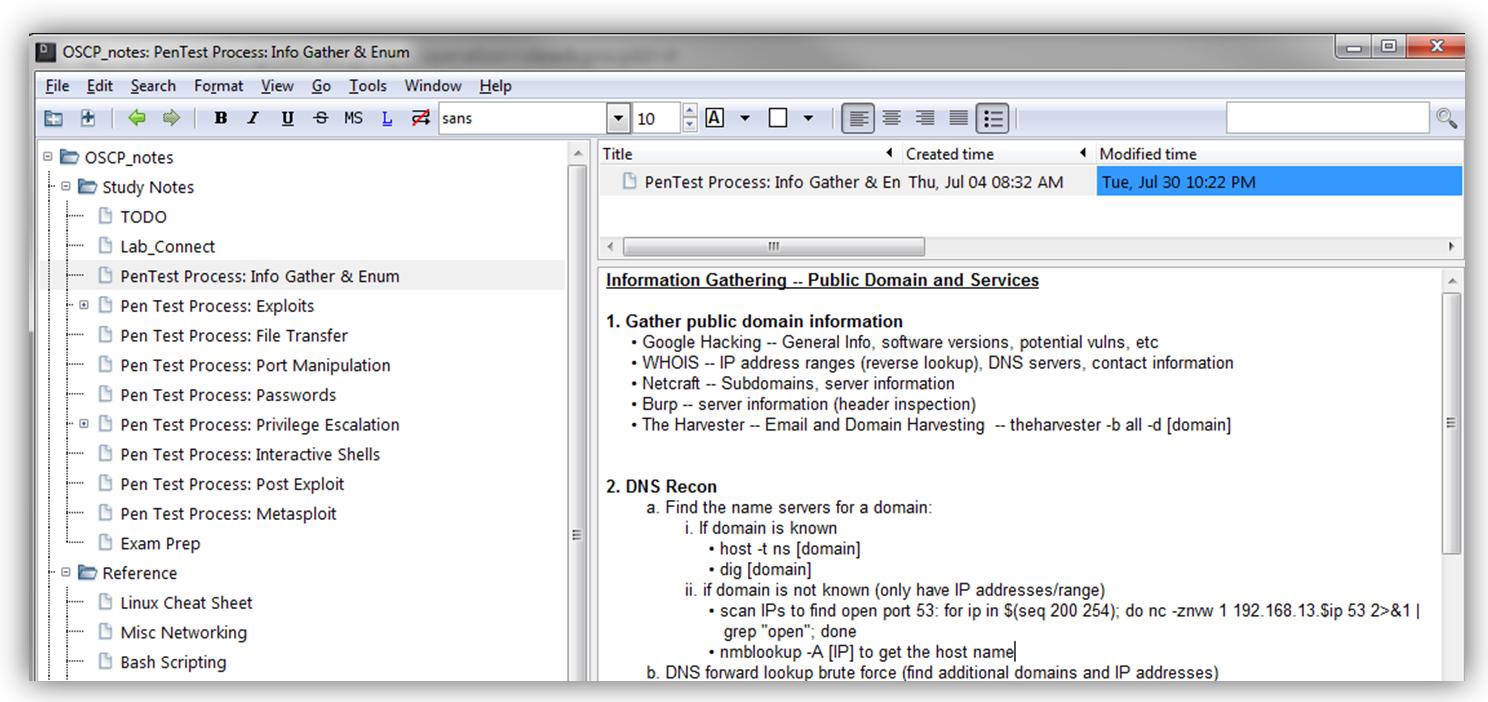
Clear, thorough, and organized notes are a key to success. You’re going to cover a lot of material in a relatively short amount of time and when it comes time for the exam, you’ll be glad you kept yourself organized. I used KeepNote to organize all of my notes. It’s cross-platform (Windows, Mac, Linux), comes pre-installed on Kali and is very flexible.
As I went through the course, I took notes and organized them accordingly.
When it came time to tackle the lab systems, I used a similar approach, tracking the enumeration and exploit activities for each machine, in detail. This proved valuable when it came time to write the report.

To ensure my notes were constantly backed up, I synced my KeepNote files with Dropbox (via a auto-sync folder on my host OS). This is also where I kept my PWB lab/exam report and backup copies of my screenshots. This way, I could access them from any machine and ensure I always had the most current copies. I also took regular snapshots of my Kali VM.
The Course
I would say there are really three components to the PWB course — the “scripted” course, the lab environment, and the exam. The course materials are fantastic – a 300+ page PDF Lab Guide with hours of accompanying videos. The idea is go to chapter by chapter watching the videos, reading the course guide and performing the related exercises. You’ll cover everything from service enumeration to buffer overflows, to password and Web Application attacks. You’ll learn some pretty cool file transfer, port redirection, and tunneling methods. You’ll be able to try your hand at almost all of the attacks in the lab with the exception of ARP spoofing for obvious reasons. If you want to see all of the topics covered in the course, check out the syllabus here.
You’ll also be given access to a Windows VM on which you can compile and test exploits before attempting them on the lab targets. In addition, you’re provided access to an online forum as well as IRC chat where you can usually find an Offsec admin online. I’ve read some course reviews by past students that used the forum/chat quite a bit and others not at all. I personally only used IRC once and that was when one of the machines was misconfigured and had to be fixed by an admin. Even though I didn’t use them a lot, I thought they were great resources to have available. Just don’t expect to get any answers or freebies. From what I’ve read you might get a hint or more likely you might get the Offsec motto: “Try harder!”. Besides, it’s much more rewarding to figure out a really tough exploit on your own and it’s the best way to learn.
I’m glad I registered for 90 days of lab time. As I went through each chapter, I found myself researching a lot of related topics and taking the time to test my own ideas. It was nice not having to worry about running out of time. There were some topics, such as Web Application attacks, that I was more comfortable with, so I spent considerably less time on these chapters. This afforded me even more time to research areas that I haven’t had as much exposure to, such as port redirection and tunneling. That’s the beauty of this course – it doesn’t spoon feed you everything or force you to spend equal amounts of time on each topic. It presents the basics and encourages you to learn about each topic on your own. In many respects what you get out of the course is relative to how much effort you put in. In all, I spend about 30 days on the scripted course material.
A word about course documentation…
You will be required to submit a final report at the completion of the course (following your exam). This lab report will ultimately contain your completed course exercises, your lab work and your exam results. I can’t stress enough the importance of documenting your progress as you go. Offsec provides you with a report template but don’t put it off until the last minute! I’ve read some PWB course reviews from students that have had reports in excess of 500 pages – mine was about 260.
If you don’t happen to perform penetration testing professionally, you’ll realize that Offsec is trying to impress upon you the importance of thorough and clear documentation. Just remember that in addition to serving as proof of course completion, the assessment report should be able to walk the reader through the exploit and replicate it. Take notes, take screenshots and stay organized! This is especially true for the lab and the exam.
The Lab Environment
You are given access to about 50 disparate systems (varying OS’s, service packs/kernels, 3rd party software, etc), each with its own remote and local vulnerabilities waiting to be discovered. These systems span multiple networks, several of which are only accessible via exploitation and the various port redirection/tunneling techniques covered in the course. You should make an effort to access all networks, including Admin, and exploit as many systems as possible.
The course material introduces you to many of the enumeration and exploit methods you’ll need to exploit these systems and the lab is your chance to put that knowledge into practice (and continue to learn much more!).
Some systems you might exploit relatively easily while others (with names like Pain and Sufference) will put you to the test. My advice is to avoid Metasploit as much as possible. If you exploit a system with Metasploit, see if you can find the same exploit on exploit-db.com and try again. You’ll learn so much more and it will help you when it comes time for the exam. Familiarize yourself with Exploit Database and SecurityFocus as they’ll be invaluable resources for finding relevant exploits.
I recommend reverting (rebooting) each lab system before you try to exploit it. Remember that you’re in a lab environment with other students making changes to the same systems. There were a couple of instances when I forgot to revert a system and thought I had discovered an exploit only to find out it was put there by someone else. There will be times when you’re working on a system and someone else reverts it. While it is frustrating, it’s a fairly rare occurrence because there are so many systems across multiple lab networks and you’re limited in the number of available reverts per day (so use them sparingly!).
Another piece of advice is to enumerate, enumerate and then enumerate some more! This goes for both pre- and post-exploit. Once you’ve got root on a system, don’t just move to the next one. Remember, the lab is intended to mimic an organization’s network environment and you may find files or information on one system that will help you exploit others.
I’ve said it already, but make sure you keep good notes for each system you exploit — document open ports/services, networking data, OS/service packs, detail your exploits step-by-step and record any goodies you find (password hashes, etc). Be sure to take screenshots as you go. I kept all of this information organized within KeepNote and then transferred it to the formatted lab report periodically. I recommend updating your lab report after every couple of systems you exploit so you don’t end up with a massive reporting task at the end.
Different aspects of the lab will be challenging depending on your knowledge and experience. For me, many of the web-based vulnerabilities came relatively easy but some of the Linux privilege escalation exploits were challenging (and that much more fun!). I took the time to script the Linux privilege escalation enumeration step and learned a lot in the process (a bit more on that later).
During the lab time, I probably invested about 4-5 hours a day during the week and 6 hours a day on the weekends. In addition to a full time job and a wife in the last trimester of pregnancy I can tell you I had a lot on my plate. I’ll also say that it was well worth it. You can certainly get by with less time but again, I took the opportunity to learn everything I could about each topic and delve into other related topics along the way. By about day 75 I had gained access to all networks (including Admin) and got root/SYSTEM on 42 systems (including most of the tougher ones such as Pain, Ghost, and Niky) with limited shell access to several more. I still had a couple of weeks remaining in the lab but I decided to take that time to prepare for the exam.
Exam Preparation
Exam prep really starts from day one of the course but I took the last two weeks of my lab time to pull everything together and thoroughly test my scripts and exploits. Here’s some recommendations:
Script your enumeration
You’ll likely develop several custom scripts and use a variety of tools when enumerating in the lab. I chose to tie all of these together into one comprehensive script that could be launched against one or many targets. Here a basic overview of what my script did:
- TCP/UDP nmap scans to identify open ports/services for additional enumeration (see below)
- DNS enumeration (via dig)
- HTTP/S enumeration (via additional nmap scans and web file/directory brute forcing)
- MS-SQL enumeration (via nmap)
- SSH enumeration (account guessing via Hydra)
- SNMP enumeration (via nmap and onesixtyone)
- SMTP enumeration (via nmap and custom account guessing scripts)
- SMB enumeration (via samrdump)
- FTP enumeration (via nmap and hydra)
Of course you’re only limited by your imagination and scripting skills so I’m sure there are plenty of additional enumeration steps that you might think of automating. For me, the key was identifying the minimum tasks I wanted to perform while considering time and exam limitations (you won’t be able to use automated vulnerability scanners such as Nexpose, Nessus, etc). As a result I made sure to craft the script to only run the applicable enumeration scripts (based on running services) and omitted automated vulnerability tools. Having a single script that orchestrates and formats the output for all of these various scans saved me a ton time. When it came time for my exam this proved especially useful because the exam guide gave specific instructions for one of the target systems and while I was working on that system I launched my enumeration script against the rest of the target IPs. By the time I had gotten root on my first exam system, enumeration had completed for the rest.
Per request, I’m providing my enumeration scripts below. Please note that these scripts come as-is with no promise of accuracy and no intent to update.
Script your privilege escalation checks
Linux privilege escalation can be a complicated task as there are so many possible vectors. Running commands one-by-one is tedious and time-consuming, especially when you have to repeat it across many systems. Again, this was another prime opportunity to leverage the power of automation.
Here’s an overview of what my Linux privilege escalation script identified:
- Basic system info (OS/Kernel/System name, etc)
- Networking Info (ifconfig, route, netstat, etc)
- Miscellaneous filesystem info (mount, fstab, cron jobs, etc)
- User info (current user, all users, super users, command history, etc)
- File and Directory permissions (world-writeable files/dirs, suid files, root home directory)
- Files containing plaintext passwords
- Interesting files, processes and applications (all processes and packages, all processes run by root and the associated packages, sudo version, apache config file, etc)
- All installed languages and tools (gcc, perl, python, nmap, netcat, wget, ftp, etc)
- All relevant privilege escalation exploits (using a comprehensive dictionary of exploits with applicable kernel versions, software packages/processes, etc)
I wrote it in python and uploaded it to each Linux system I compromised to automate all of my enumeration actions and if necessary, privilege escalation exploit discovery. Per request, I’ve included a copy of the script for download below. Note that this script come as-is with no promise of accuracy and no intent to update.
There are several other Linux and Windows privilege escalation scripts freely available and I did try a few, but writing my own allowed me to easily customize the checks I wanted to perform and taught me a great deal more. If you want to get some ideas for additional privilege escalation check out these resources:
- Basic Linux Privilege Escalation (g0tmi1k)
- Windows Privilege Escalation – a cheatsheet (Tim Arneaud)
- Linux/Unix privileges from a blackhats perspective
- Automated Unix Privilege Escalation Check (pentestmonkey)
- Automated Windows Privilege Escalation Check (pentestmonkey)
Organize and pre-compile your exploits
I kept all of my exploits organized in a customized file structure on my Kali machine but taking the extra steps of pre-compiling and testing the Windows-based exploits really saved me time. I made it a point to modify, compile, and test every remote and local Windows non-Metasploit exploit I could find. I organized my compiled exploits and made a very basic chart with the exploit name, MSXX-XXXX number, Exploit-db number, and applicable Windows OS versions.

During the exam if I came across a situation that required a remote or local Windows exploit, I could simply reference my chart and test the pre-compiled exploit.
Per request, I’ve uploaded an unformatted csv example below. Please note these only represent the exploits that I was able to compile and confirm. I make no guarantees regarding its accuracy or completeness.
The Exam
I registered for the exam about two weeks before my lab time ended. At your allotted exam start time (I chose 10 am on a Friday) you’ll receive the VPN connectivity pack and exam guide that provides instructions, identifies your target machines, and outlines any restrictions. As many other PWB review sites have stated, there are limitations on the use of Metasploit as well as automated vulnerability scanners such as Nexpose or Nessus so once again, don’t depend too heavily on these during your lab time! Don’t worry, you’ll get very specific instructions on what is and is not allowed when you receive your exam guide. You are allotted 24 hours for the exam, with an additional 24 hours to complete and submit your lab/exam report. Each of the target machines is assigned a point value and you need a minimum number of points to pass the exam. I’m not sure if these ever vary, but in my case I needed 70 out of 100 points to pass. In all, it took me 8 hours (with breaks) to accumulate enough points to pass the exam. I still had one more system that I had not exploited but I chose instead to finish and submit my report (which took about another 2 hours). Though I was tempted to use the remaining 16 hours to get that last system, given that my wife was 9+ months pregnant, I wanted to avoid any scenario that involved me not finishing and submitting my report before she went into labor! With the report submitted, I slept soundly that night and received confirmation of its receipt the following morning. I received notification that I passed the exam and achieved the OSCP certification that Tuesday.
As far as recommendations for the exam, remember to get plenty of rest the night before and take frequent breaks. I took one after every system I completed with a longer dinner break once I had accumulated enough points and before I completed my report. Try and focus on one system at a time but don’t get bogged down. If you get really stuck, move on to another system. Again, organizing my notes/scripts, automating the enumeration and pre-compiling the Windows exploits allowed me to really focus on relevant exploits without wasting too much time.
Conclusion
This was the most fun and challenging course I’ve ever taken. It’s also the most satisfying because although the course material is excellent, much of what you accomplish is due to your own hard work and commitment to Try Harder! I learned a lot and I can’t recommend it enough for anyone that wants to wants to get access to a quality lab environment and hone their pen-testing skills. Since exploit development is one of my areas of interest, I definitely plan on taking the Cracking the Perimeter course as well as the Advanced Web Attacks course (once it’s offered online).